
How to Make a Perler Bead Pattern from a Picture
Make a Perler bead pattern from a picture. Follow illustrated steps for grid size, colors, bead counts and printable charts, with a free heart.
To make a Perler bead pattern, turn your picture into a grid with one colored cell per bead, simplify the colors, and choose matching beads from your supplies. Check the grid against your pegboard before exporting it.
Follow the seven steps below with our downloadable two-color heart. Its source image, numbered chart, and A4 PDF are ready to use, so you can practice before converting your own picture.
For your own picture, try the free Perler bead pattern generator. It gives you a numbered chart, Perler reference colors with bead counts, and a printable page for each 29×29 board.
1. Choose a picture with a clear shape
Start with one recognizable subject: a heart, a flower, a simple animal silhouette, or your own pixel drawing. Broad color areas and a clear outline survive simplification better than fine texture and soft shadows.
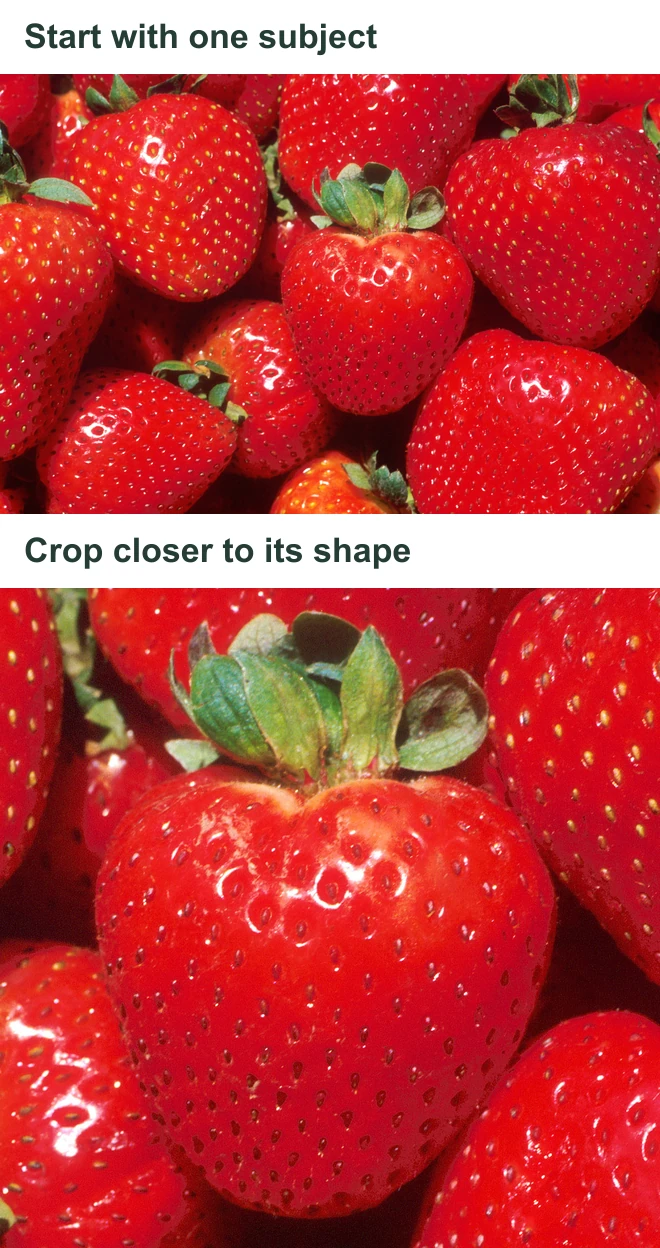
For a photo, crop close to the subject. The strawberry below occupies much more of the cropped image, giving its shape more room in a small grid.
Remove an unwanted background in your usual image editor; otherwise, it becomes part of the pattern and adds beads. A transparent PNG leaves empty positions around a motif. Use an image you own or have permission to adapt. To draw a simple source yourself, follow our pixel art tutorial.
2. Choose your beads and check the pegboard
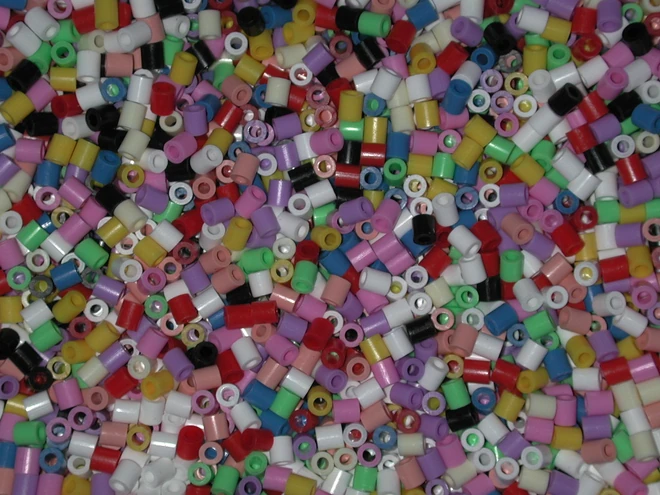
Gather beads of one size, a compatible pegboard, and the fusing supplies recommended by the manufacturer. These loose Hama beads show the hollow cylinders you will place on the pegs.
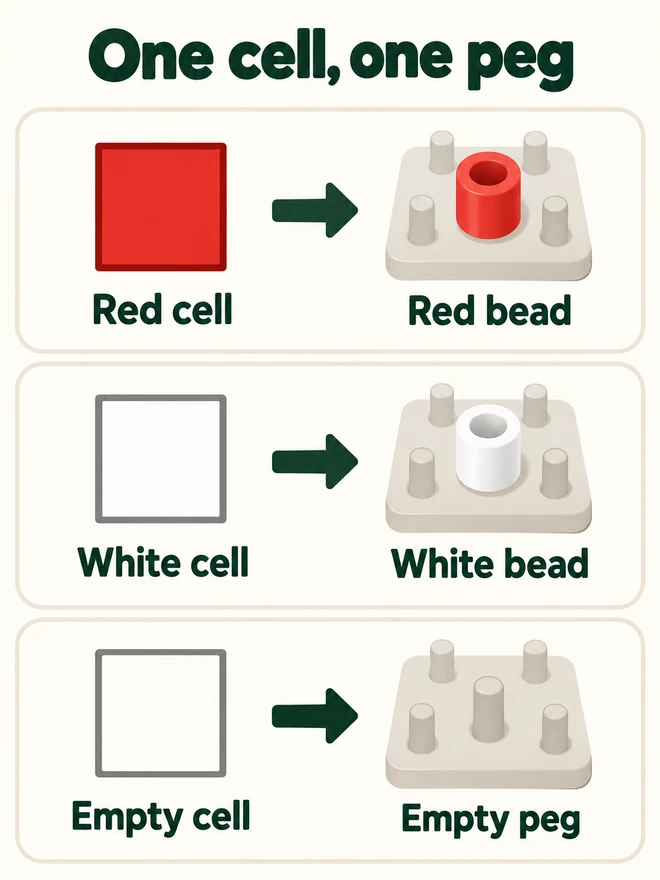
Count the usable pegs across and down. A chart that is 32 cells wide needs 32 peg positions across. Each filled cell gets one bead; empty cells leave pegs bare.
Choose the bead size before settling on the chart width. Hama specifies 5.0 mm Midi and 2.5 mm Mini beads, so the same bead count produces a different physical footprint. Check your brand's board compatibility: Perler Mini pegboards do not take standard-size beads. For a first pattern, use a design that fits one board you already have.
3. Turn the picture into a grid
Open the pixel art grid generator and upload a PNG, JPG, or WebP. It works in your browser without an account, and the picture stays on your device.
For the practice heart, download the 11×11 source PNG, upload it, and leave Keep original size selected. Choose Original colors and keep color numbers enabled. Check that the result says 11 × 11 cells · 2 colors.

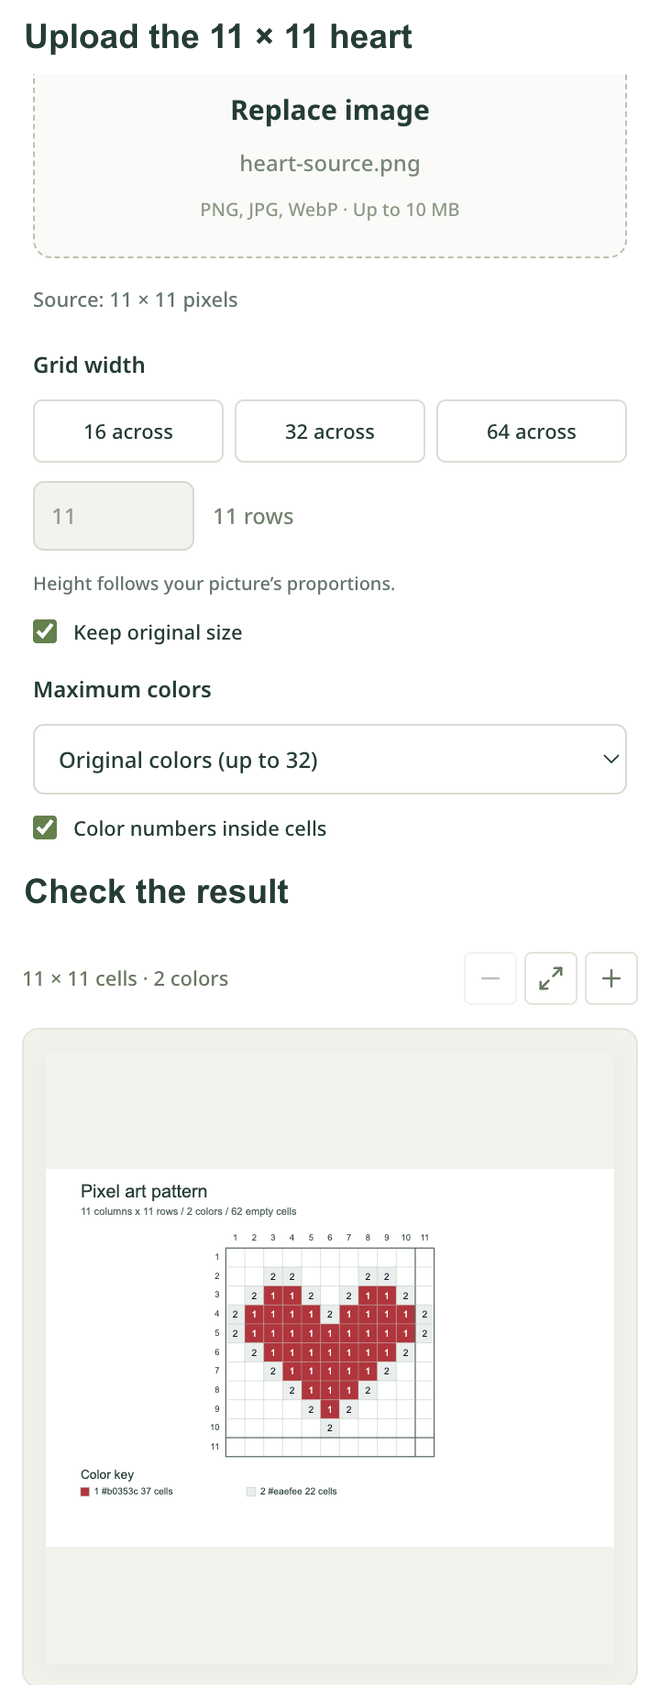
For a photo, start at 32 across. Try 16 across for a smaller project if the outline remains recognizable, or 64 across when a key detail disappears and your board has room. Height follows the picture's proportions, so check both dimensions.
Changing our heart from 11 to 32 columns increased the filled cells from 59 to 484. The larger version needs more board space and more beads even though the shape looks similar.
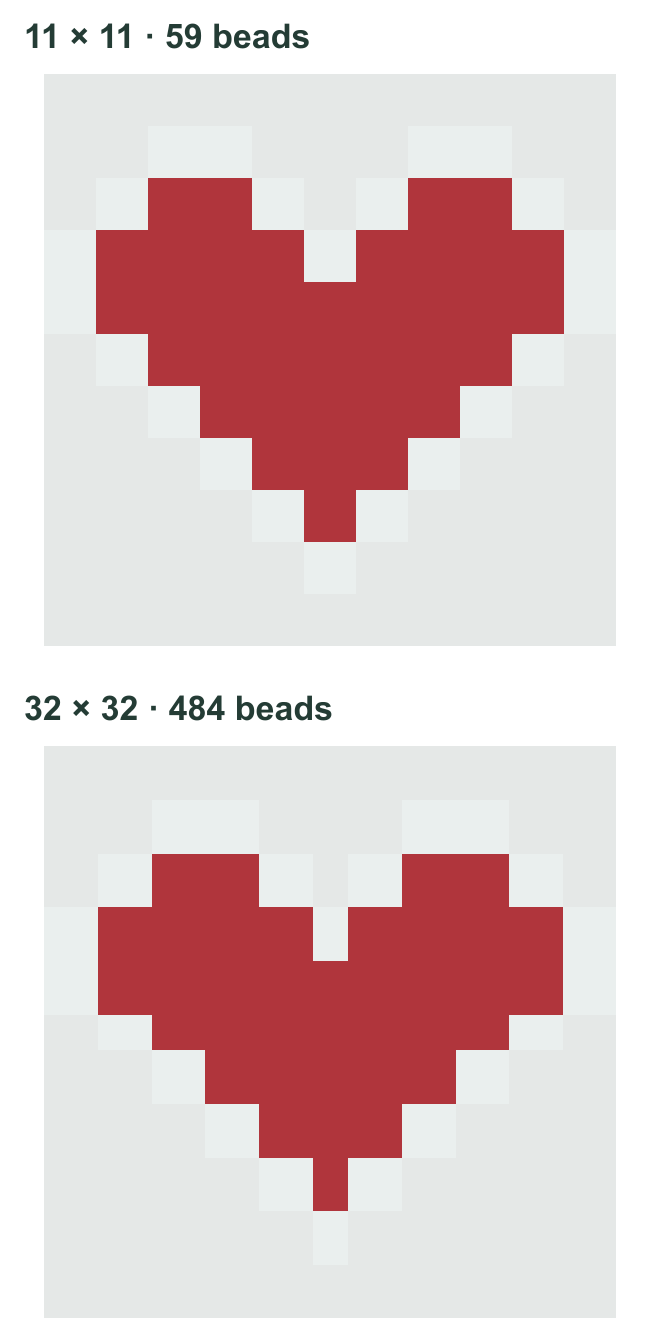
Keep an existing small pixel drawing at its original size when you want one source pixel to become one bead.
4. Simplify the colors and repair the outline
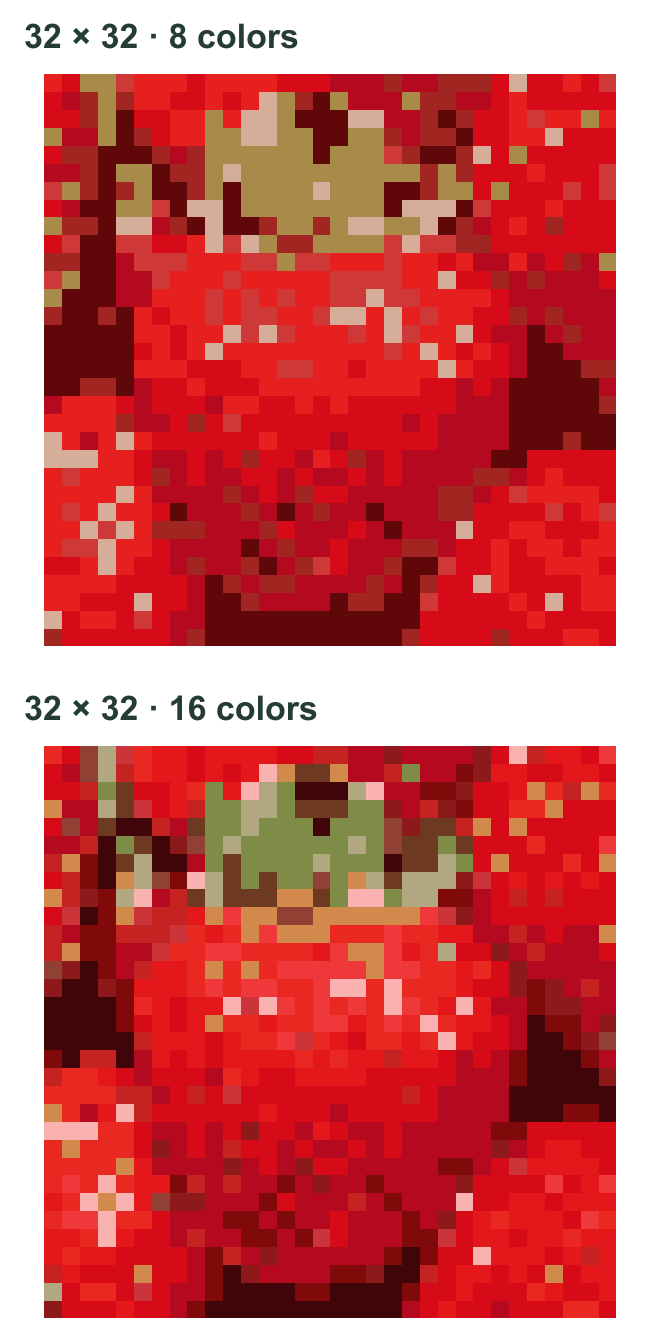
For a photo, compare the 8, 16, and 32 color limits. Choose the smallest palette that preserves the features you care about.
Here is the same strawberry crop at 32 cells wide. Eight colors keep the main red shape but turn much of the leafy top brown. Sixteen colors retain more green and more highlight shades. Choose eight if the simpler color sorting suits your design; keep sixteen if those distinctions matter to you.
The heart needs only its original two colors. Zoom in to check for stray cells, breaks in the outline, or detached details. In this cleanup example, remove the stray red cell at row 1, column 1, and restore the white outline at row 3, column 2.
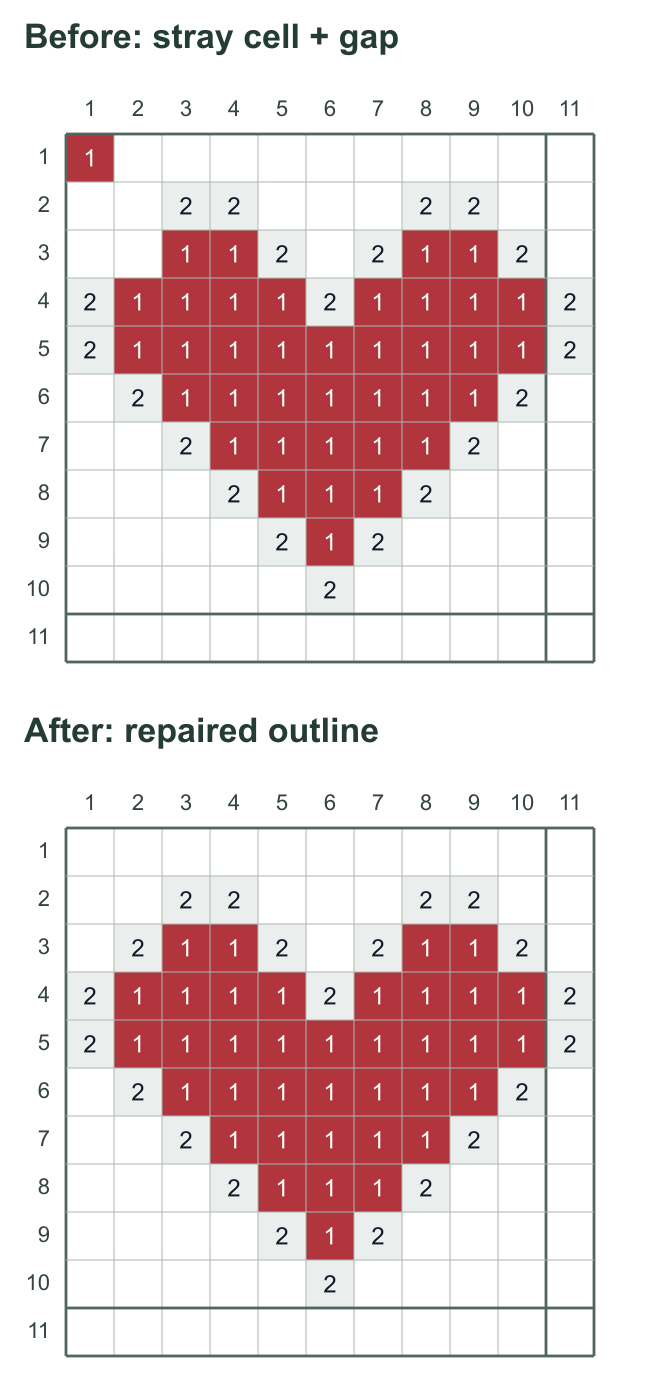
To make a repair, download Image only, edit the small PNG in your usual pixel editor, and upload it again. SpriteFuse's grid tool does not paint individual cells. For one connected motif, check that intended details connect through side-by-side beads before placement and fusing.
5. Match the color key to your beads and count them
A chart number identifies a color within that chart. Choose the corresponding physical bead color yourself, then write down the substitution. Compare the actual beads when two shades look similar on screen.
Read the coordinates and the key from our heart chart:
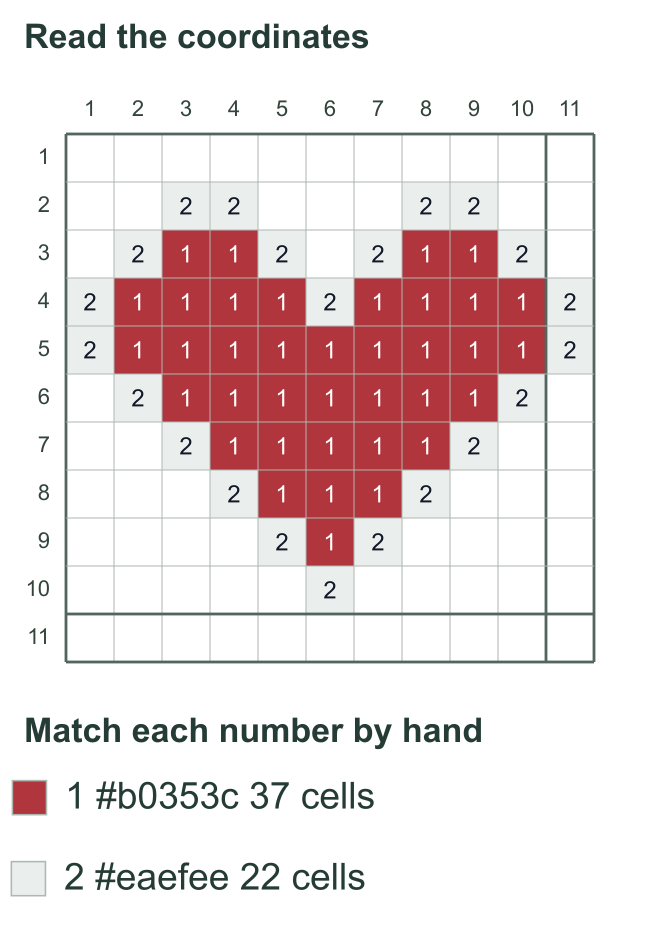
| Chart number | Bead color to choose | Beads needed |
|---|---|---|
| 1 | Your red | 37 |
| 2 | Your white | 22 |
Set aside 37 red + 22 white = 59 beads, plus a few spares. The remaining 62 cells are empty positions. Put white beads only in cells marked 2; leave unnumbered cells empty. If you use one physical color for two chart numbers, add their counts together and keep the substitution consistent.
6. Download a chart you can follow
Choose Download pattern PNG for a chart you can zoom into on screen, or select A4 or US Letter and use Download PDF for a single-page print reference. Both include coordinates and a color key. Image only saves the small pixel picture for editing.
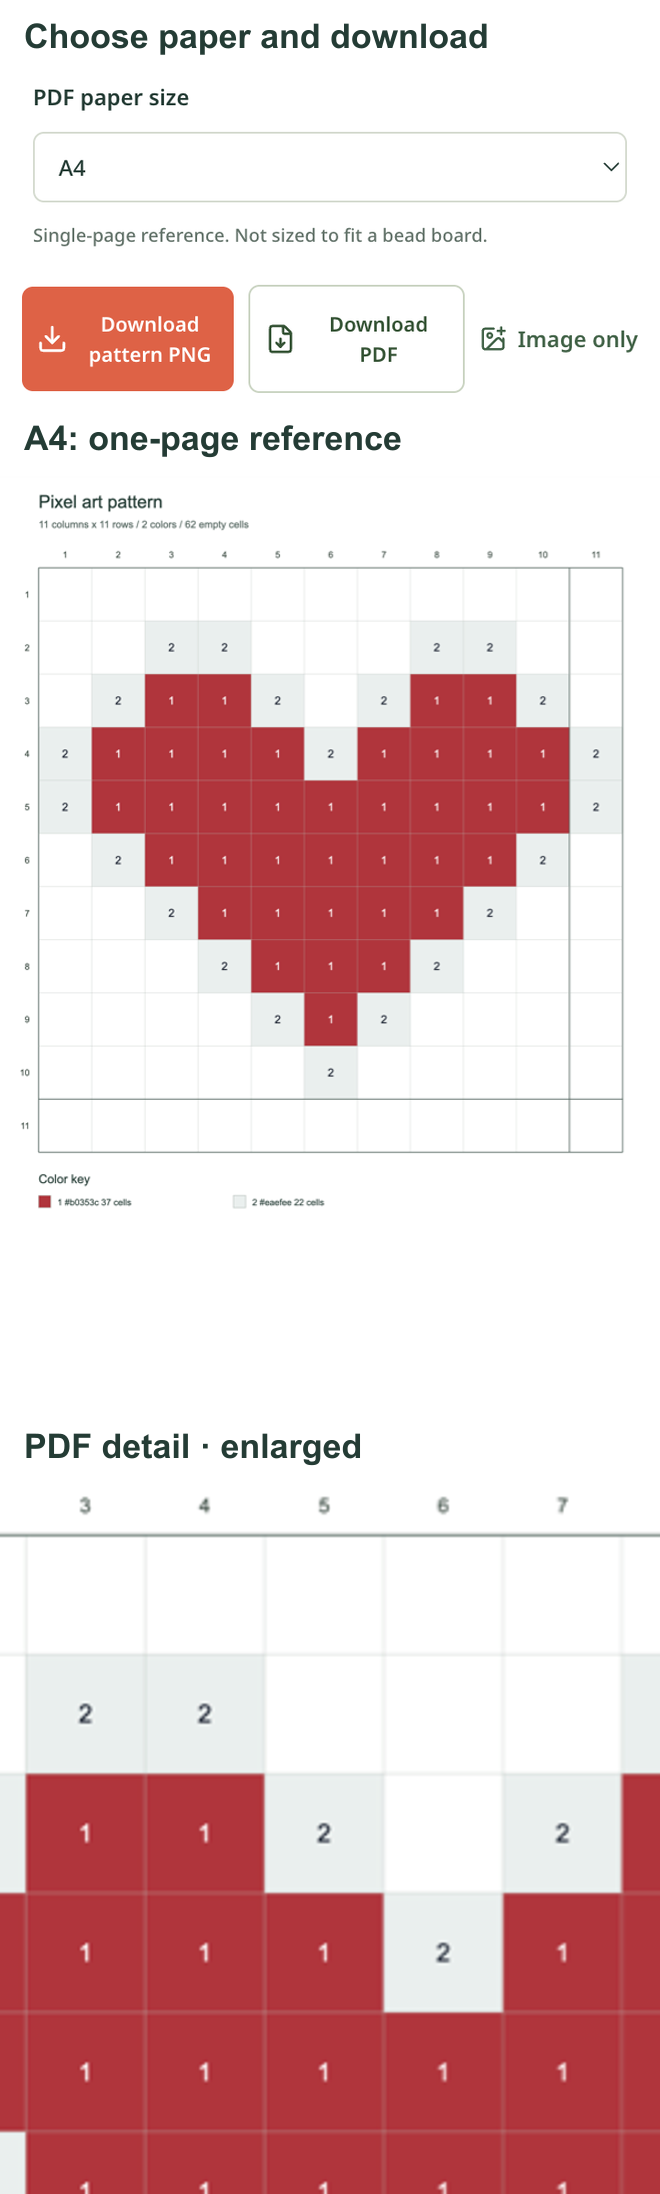
Save the heart pattern PNG or the heart A4 PDF. Print a test page and check that you can distinguish the cells and numbers. Keep it beside your board: the PDF is not calibrated to fit underneath a pegboard.
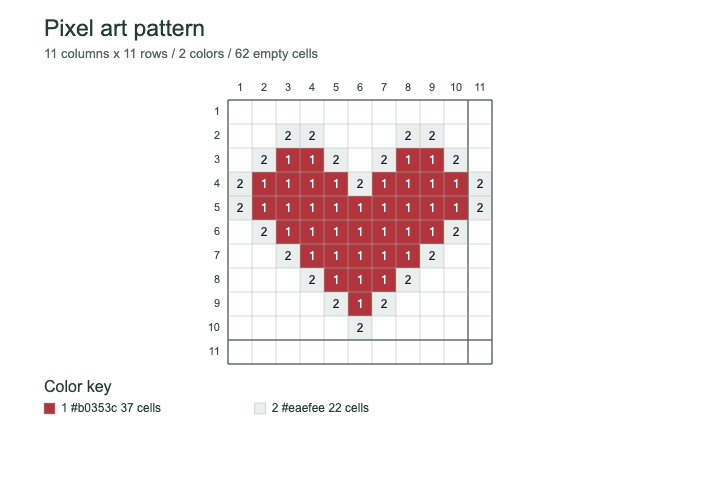
For dense patterns, the tool may ask you to turn off numbers before exporting a single-page PDF. If you need those numbers, use the PNG on screen or reduce the grid size.
7. Place the beads and check the pattern
Sort your colors, put the board on a stable surface, and follow the chart's rows and columns. For the heart, row 1 is empty. In row 2, place white beads at columns 3, 4, 8, and 9.
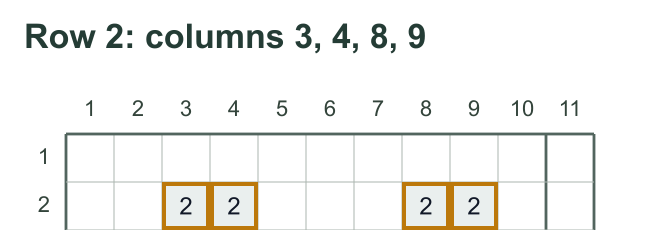
Continue down the chart, using 1 for red and 2 for white. Check your position every few rows so an early offset does not carry through the design. Inspect both halves, the outline, and the pointed bottom before applying heat.
Follow the fusing instructions supplied with your materials. Perler's project instructions call for an adult to fuse on a flat, heat-safe surface and let the design cool.
Start with the heart's source PNG and 59 beads. Once you can comfortably follow that chart, repeat the same choices with your own picture.
Author

Categories
More Posts
How to Make a Tileset: Draw, Test, and Export Pixel Art
Learn how to make a tileset with a small grass-and-pond example. Draw edges and corners, check seams, export a PNG, and try the downloadable Godot project.

How to Make Game Assets for Your First Game
Learn how to make game assets for 2D and 3D games, from a consistent asset list to sprites, UI, sound and a working Godot example you can download.
How to Make Pixel Art in Minecraft with a Block-by-Block Plan
Turn a picture into Minecraft pixel art: choose a build size, compare real block palettes, gather materials, and place each row from a numbered guide.