How to Make Pixel Art in Minecraft from an Image
Turn a picture into a Minecraft block plan, gather the right materials, and follow a numbered guide to build a wall mural.
To make pixel art in Minecraft, turn your image into a grid where one filled square means one block. Pick a size you can build, match the colors to named blocks, then follow a numbered chart from the bottom row up. Keep the material list beside you so you know what to gather before you start.
This walkthrough uses our amethyst geode mural. You can open the Minecraft pixel art generator and choose Try 16×16 first build to follow the same plan, or upload your own image.
Choose an image that still reads at block size
Start with a clear outline and a few large color areas. Tiny lines and soft gradients are hard to follow when each square becomes a full Minecraft block. A transparent PNG helps you keep the surrounding space empty; the tool leaves those squares out of the art-block count.
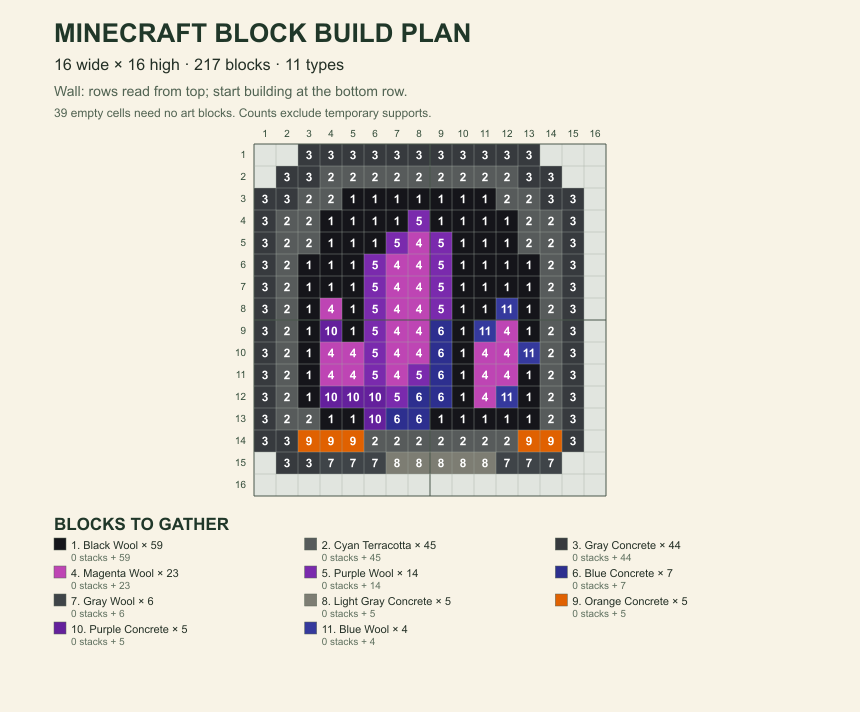
Our starter geode image is 16×16 pixels, derived from a larger original we drew for the generator. Its cave outline, purple crystals, and orange glow are still visible in the 16-block-wide plan. The generated chart has 217 blocks, 39 empty squares, and 11 block types. You can download the exact 16×16 source image if you want to repeat the steps.
Do not increase width just to look for extra detail
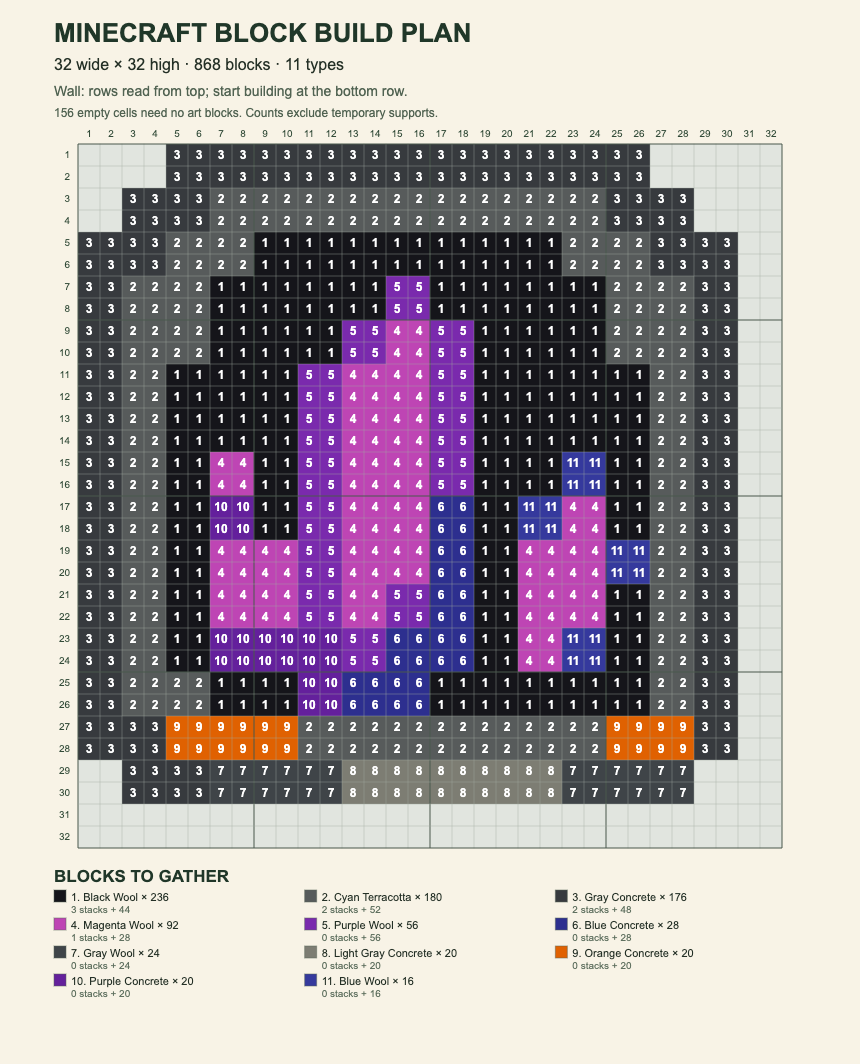
We ran that same 16×16 source through the tool twice with the same mixed block setting. At 16 blocks wide, the chart needs 217 blocks. Changing only the width to 32 produces 868 blocks: each original square becomes a 2×2 group of the same block. The picture is physically larger, but it has no new shapes or shades.
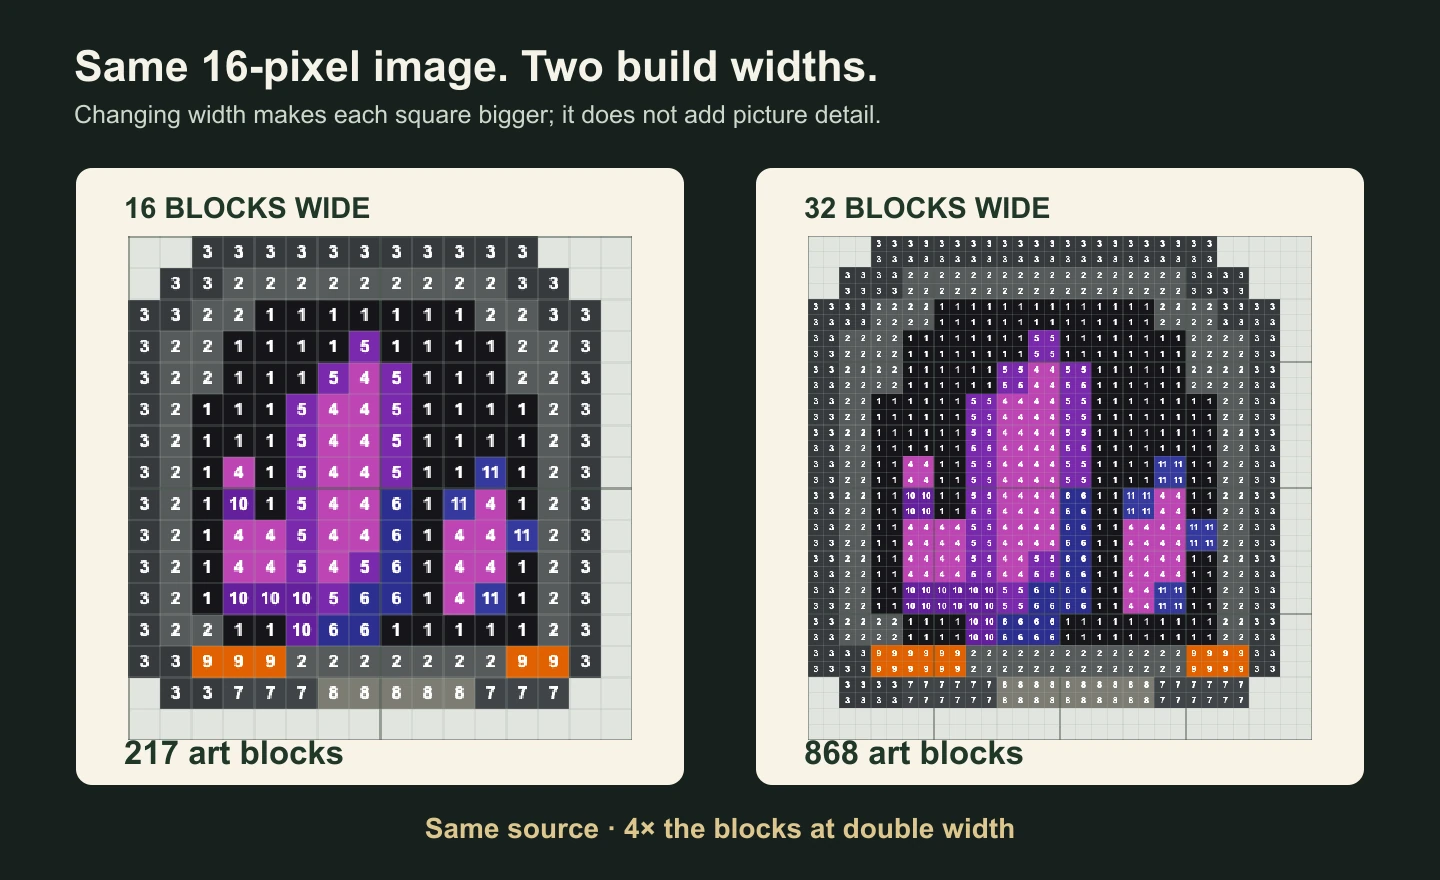
The same source at two build widths. Choose 16 for this first mural; choose 32 only if you want it twice as wide and can gather four times the art blocks. Open the full 16-wide chart or full 32-wide chart made from this 16-pixel source to read every cell.
If you want finer crystal details, begin with an image that contains those details, such as the generator's separate 32×32 geode example. A larger width setting cannot invent pixels that were absent from your source.
Match the image to blocks you can gather
In the Minecraft pixel art generator, open the 16×16 example or upload your PNG, JPG, or WebP. Keep Build width at 16 for this example. Select Mix for closest colors and 16 types · balanced, then choose Wall mural. The preview turns each filled square into a named Minecraft block and gives it a number in the chart.
The mixed palette uses concrete, wool, and terracotta. You can choose just one of those families if that fits your inventory, then check the new preview and material list before building. The match uses average colors from Java 1.21.4 block textures, so it is a planning approximation: actual texture and lighting in your world may look different. The tool has no game-version selector. Check that the named blocks are available in your version and play mode before gathering them. One player building in an older world described missing some blocks; the material list is the place to catch that problem early.
Read the chart and gather the materials
Click Build guide PNG to keep the numbered map on a second screen. A player on r/Minecraft asked for a guide showing which block goes where. The numbered map does that: each number points to a block in the key below the grid. For this geode, 1 is Black Wool, 2 is Cyan Terracotta, and 3 is Gray Concrete. Empty squares have no number and need no art block.
The matching Materials CSV lists all 11 types and their counts. The largest quantities are below; use the full example CSV for your complete gathering list.
| Block | Blocks to place |
|---|---|
| Black Wool | 59 |
| Cyan Terracotta | 45 |
| Gray Concrete | 44 |
| Magenta Wool | 23 |
The CSV's 11 counts add up to 217. That matches the filled squares in the chart; the 39 transparent squares are excluded. If you change the width, block family, or image, download a fresh CSV because the old list no longer describes your current chart. Temporary supports or a backing wall are also outside the 217-block art count.
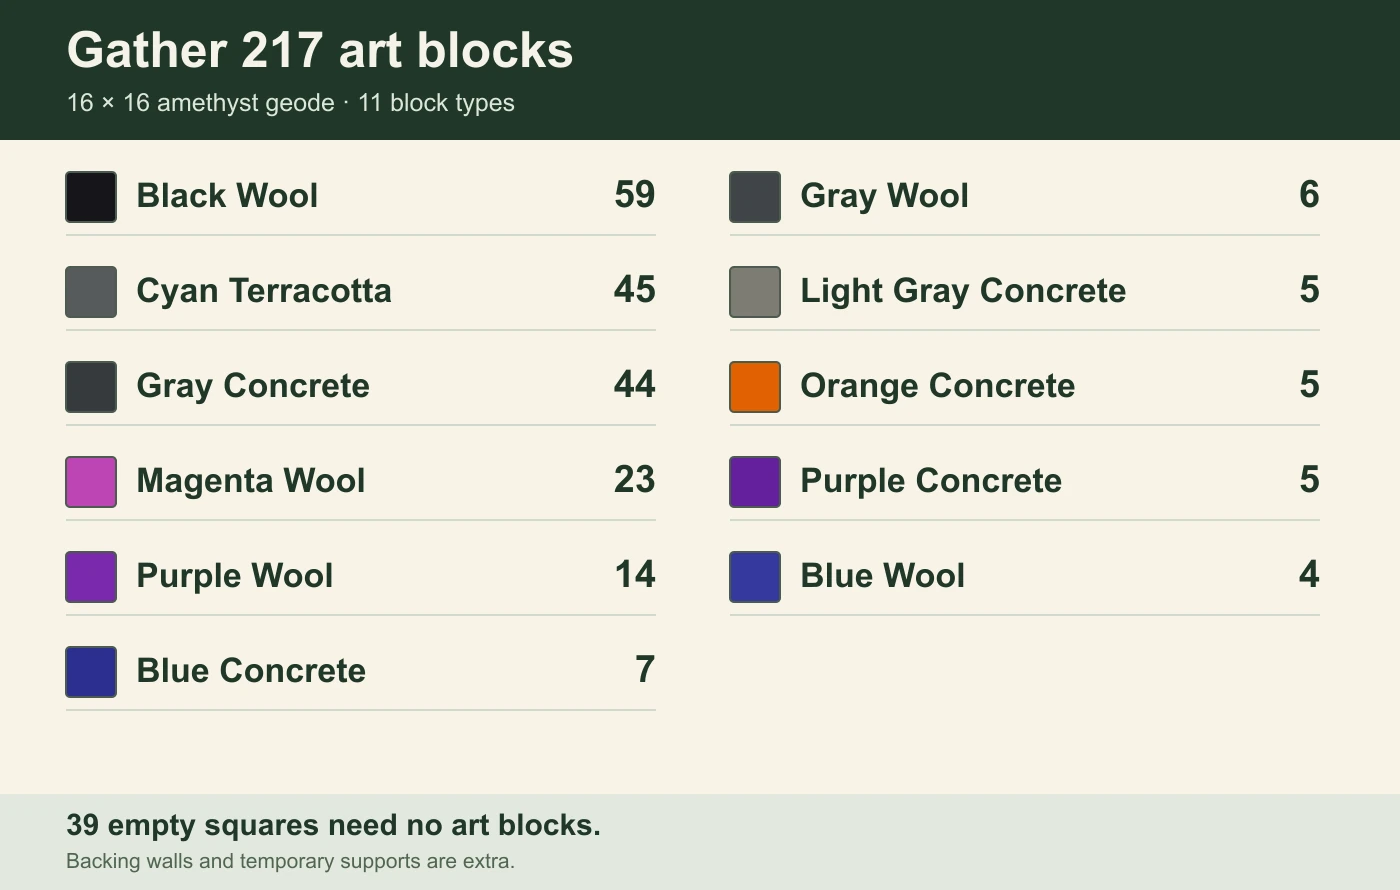
This visual is derived from the actual materials CSV. The counts refer to the visible art blocks, not the wall behind them.
Build the mural from the lowest filled row
Keep the chart facing you. Column 1 is at the left; row 1 is at the top. For a wall mural, work upward from the lowest row that contains blocks. Row 16 is completely empty in this plan, so the first art blocks go on row 15. You can align row 15 with your ground line rather than leaving a blank strip below it.
On row 15, leave column 1 open. Put Gray Concrete in columns 2–3, Gray Wool in 4–6, Light Gray Concrete in 7–11, and Gray Wool again in 12–14. Leave columns 15–16 open. On row 14, the orange accents are Orange Concrete in columns 3–5 and 13–14. Check the chart for the other blocks on that row before moving upward.
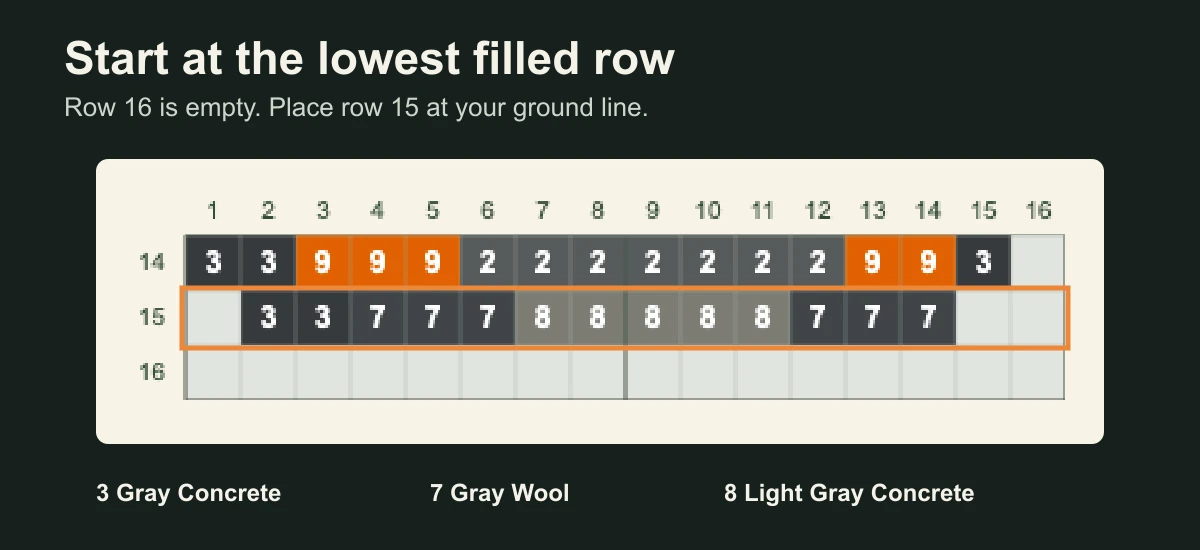
The numbers come from the full actual 16×16 chart. Row 16 is blank; start with the placed blocks on row 15.
Continue one row at a time and step back after each few rows to compare the cave outline with the source. If the image looks mirrored, check which side of the wall you are viewing before changing blocks. The chart shows the front view. For a flat ground build, select Flat ground in the tool and read that plan from above.
Save the plan you will use in your world
For this exact example, download the numbered 16×16 PNG guide and materials CSV. In the generator, Printable PDF makes a paper copy after you choose US Letter or A4. Keep the chart and list from the same settings.
These files guide a manual build. They are not .schem, .litematic, or an in-game import. If you want to draw a new source image first, the beginner pixel art drawing tutorial shows how to make a small PNG. Then bring that PNG back to the Minecraft block planner, inspect its preview, and gather the blocks shown in its own list.